It takes a lot of effort to create a branded vehicle from start to finish, that’s why quality work is vital every step of the way.
What comes to your mind when you think about a branded vehicle? A boring gray-coloured car with a logo slapped on? Maybe a stock image of a person deemed to represent the brand alongside it? There are many ways to brand a car, many people may choose the route of going with a more subtle look for their vehicle, sprinkling some human faces as well to make their brand look personal.
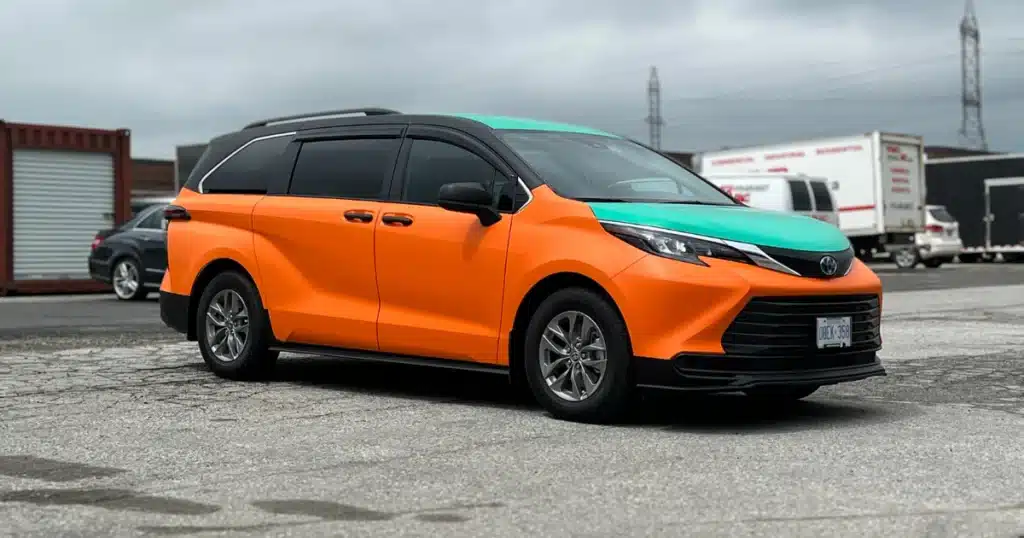
A branded vehicle doesn’t always mean boring logos and stock imagery on a car. With a simple solid-coloured wrap and a couple of decals, you turn any car into a playful representative of your brand.
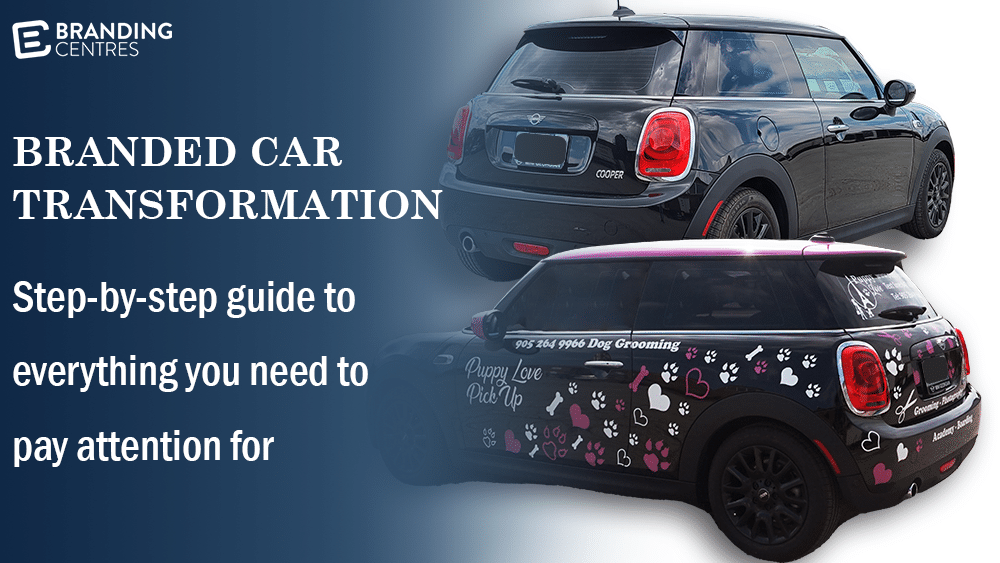
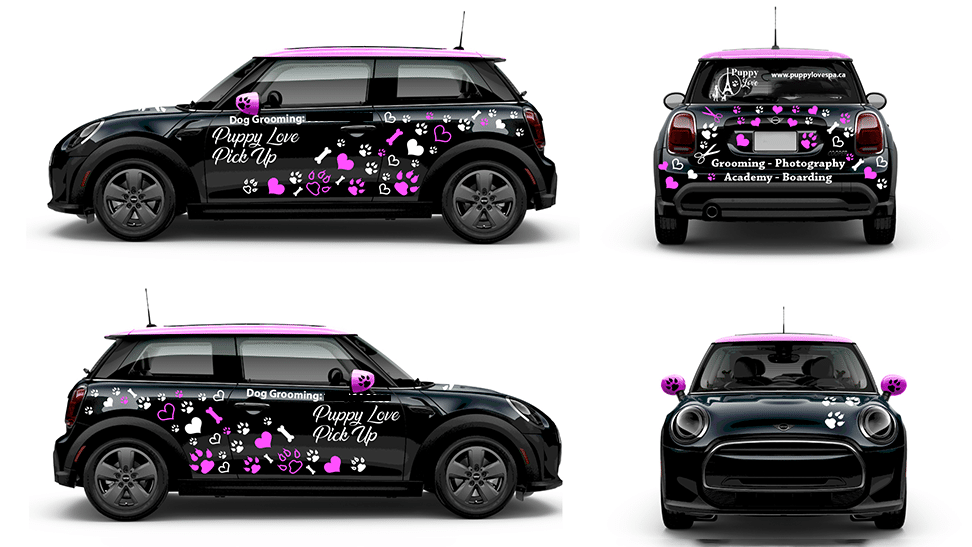
That is exactly what our client at Puppy Love Spa needed, a fresh face to represent their brand. Here are the steps of turning an average car into the star of the show.
Design process
In the first stage of creating a branded vehicle, for both personal and business use, you want to consider how you want your brand to be perceived by an outside eye. This is not just for your existing customers but also potential customers and first-time impressions of your brand. To make this step easier on yourself and be able to communicate with the designers more clearly, you might want to create a persona for your brand. Not sure what that is? You can check out our blog to find out more about brand personas.
Once you’ve decided on a concept, our designers will work on the perfect look to represent your brand on the move. The design and mock-ups will go through consultations with the client until it’s exactly to their liking. There are no shortcuts taken and no judgements given, the design will be altered until the client is satisfied.
After the design is finalized it’s ready for the next steps of creating your branded vehicle.
Printing and preparations
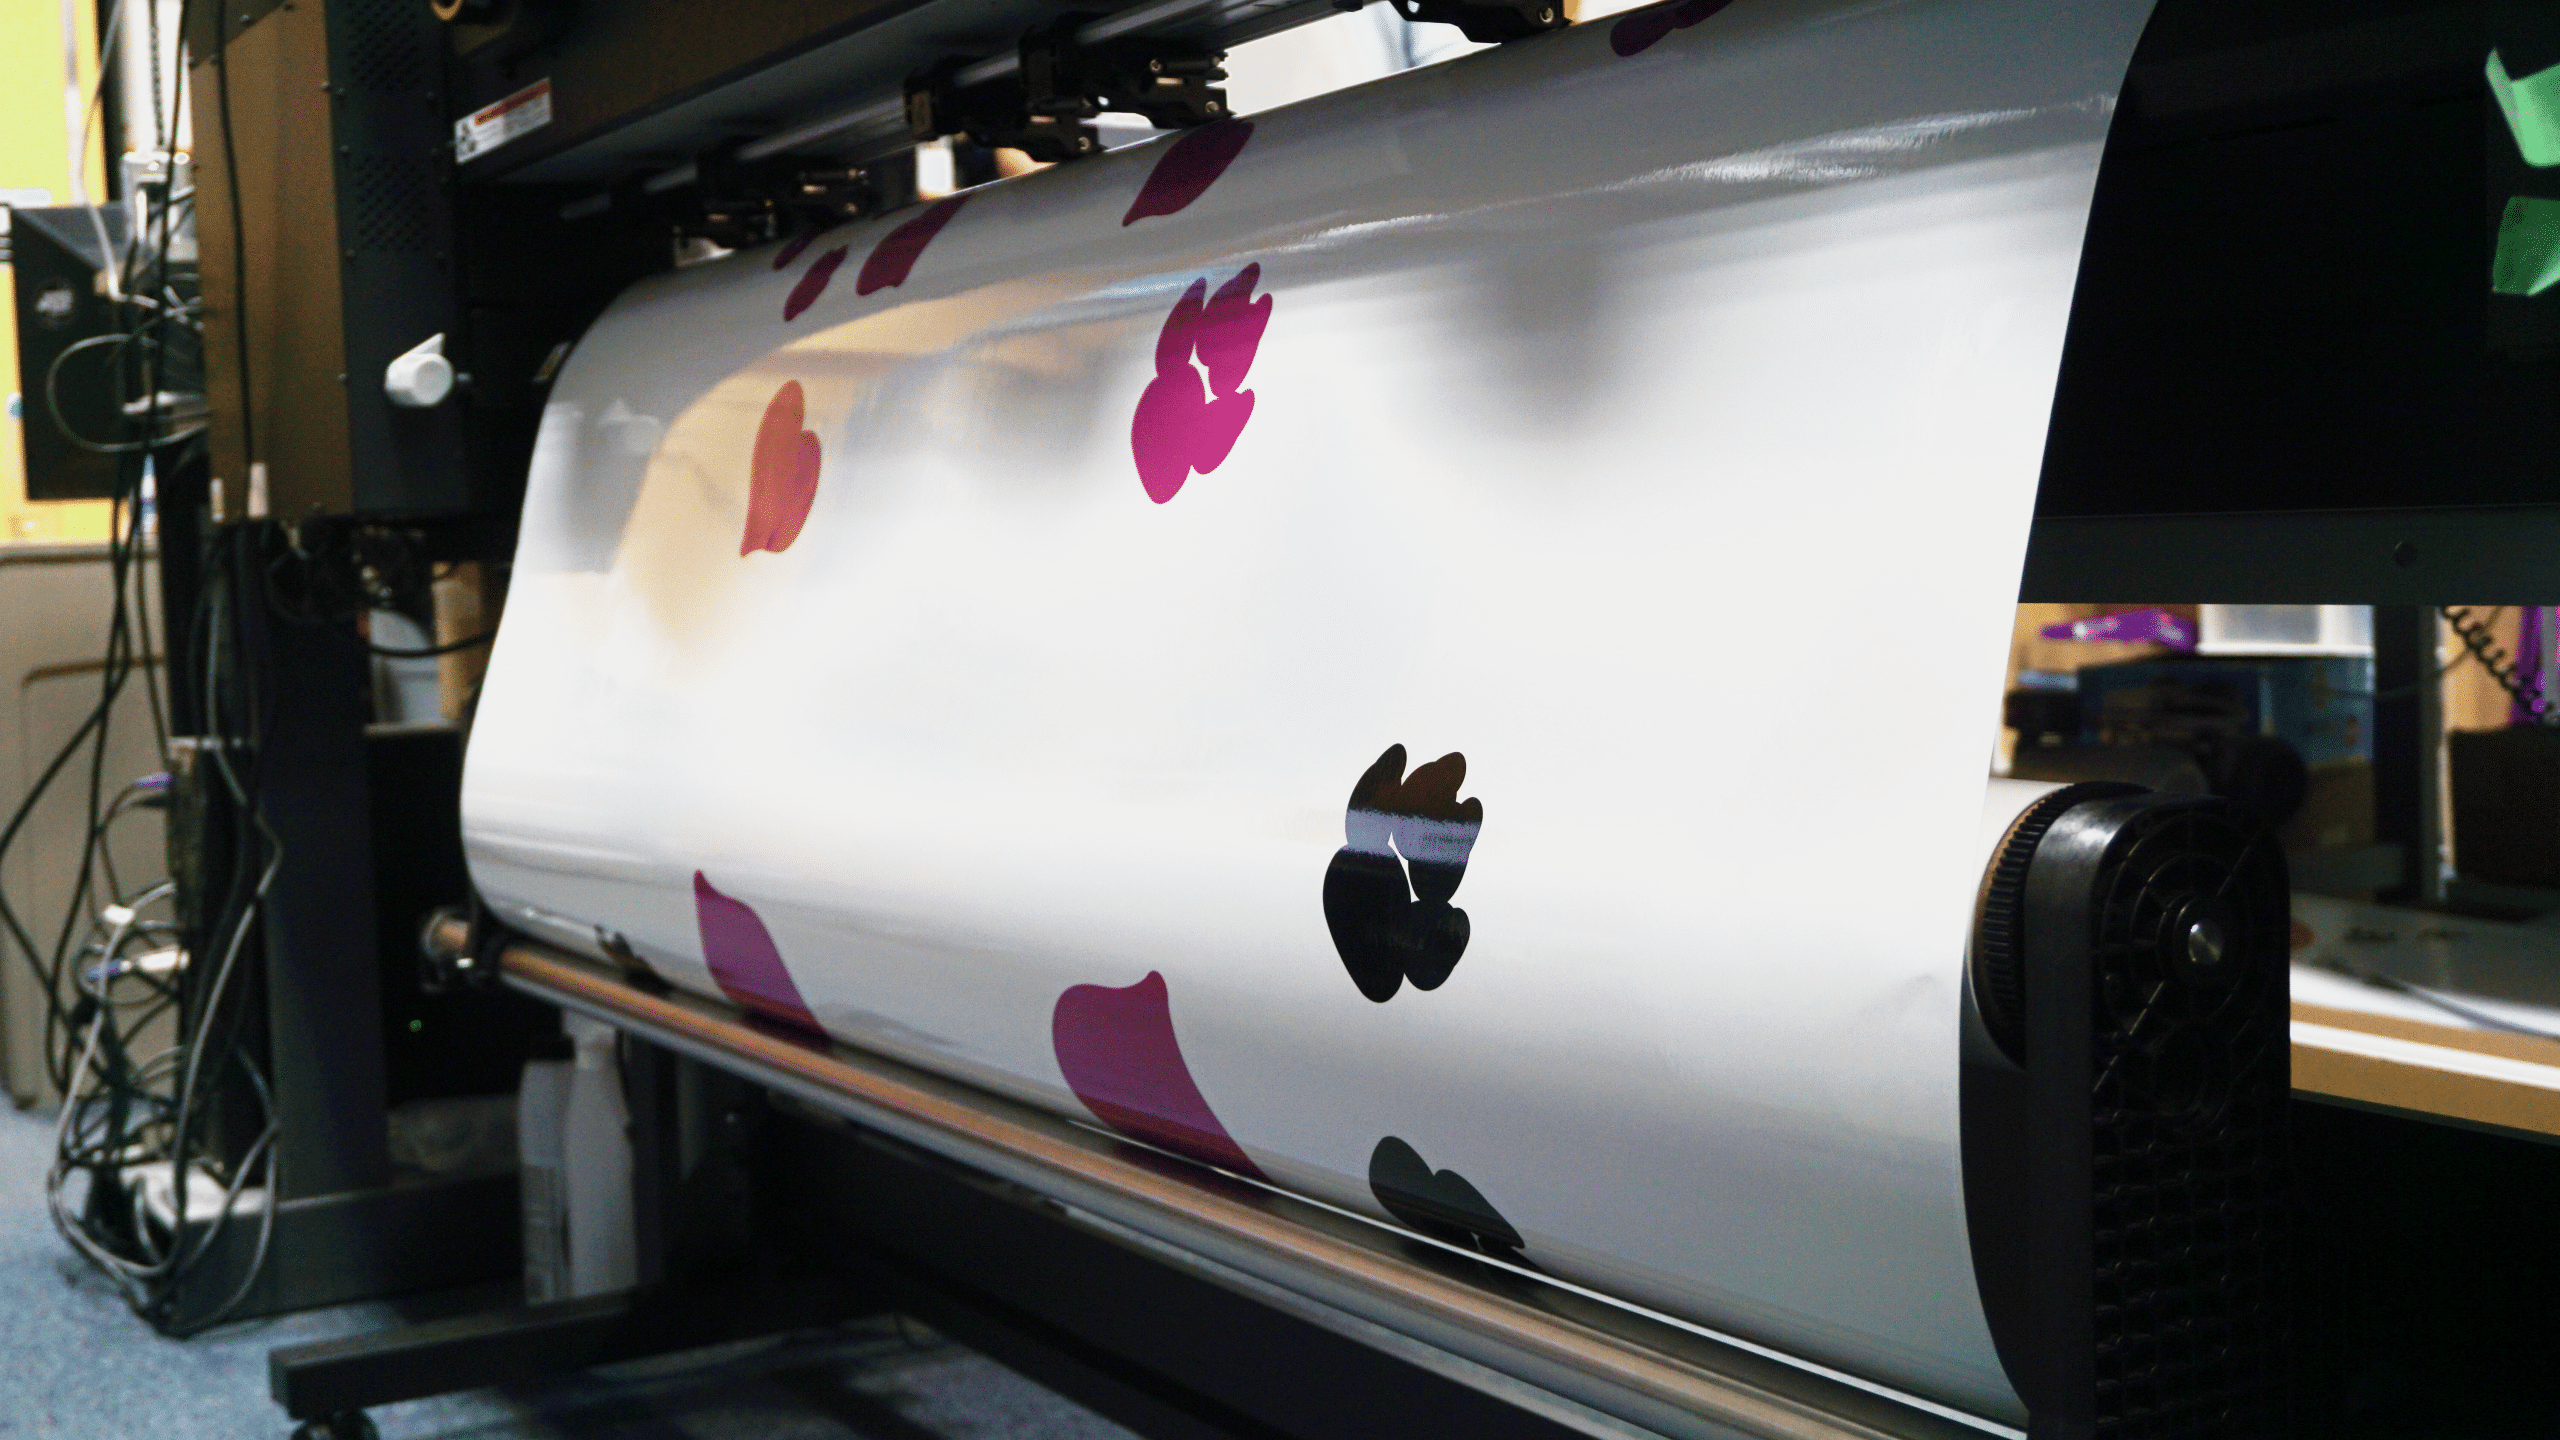
Our next step is to get our design from the virtual space to the real world. The first step is to print the design using high-quality waterproof ink and professional printers. The quality of the vinyl wrap is also crucial in this step.
The printing can take up to a full day depending on the complexity and the size of the design. More colours and more intricate designs mean more time during printing.
Our designers let the ink dry for a couple of hours before moving on to the next steps. This is important to make sure the design stays intact and free of smudges.
The vinyl wrap then goes through the same machine for outline cutting.
The machine uses a tiny blade over the vinyl to cut the outlines of the decals. Machine cut is faster and more precise but manual labour is still necessary for the weeding process.
How’s the outline traced?
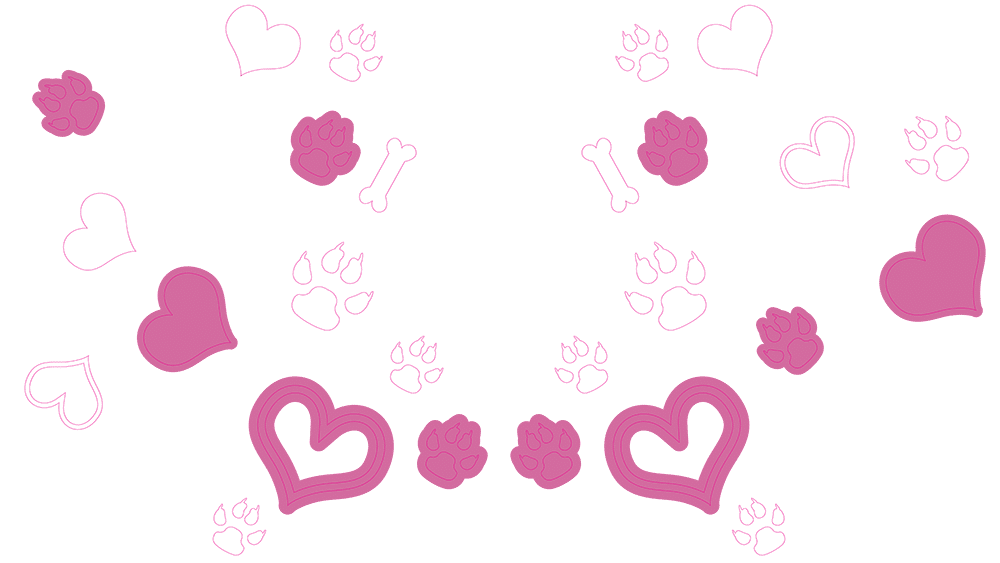
Outlines are traced in Adobe illustrator using a custom colour. The machine registers the colour name as the action to perform. The designers must pick the right colour name for the cutting process.
Once the cutting is complete the vinyl is brought to the workshop table for preparations.
The removal is done using a weeding tool to pry out the excess vinyl. Once all the vinyl is weeded out, it’s covered with high-quality transfer tape. In our Vinyl Wrap Toronto workshop, we use 3M masking tape.
Installation of the wrap & decals
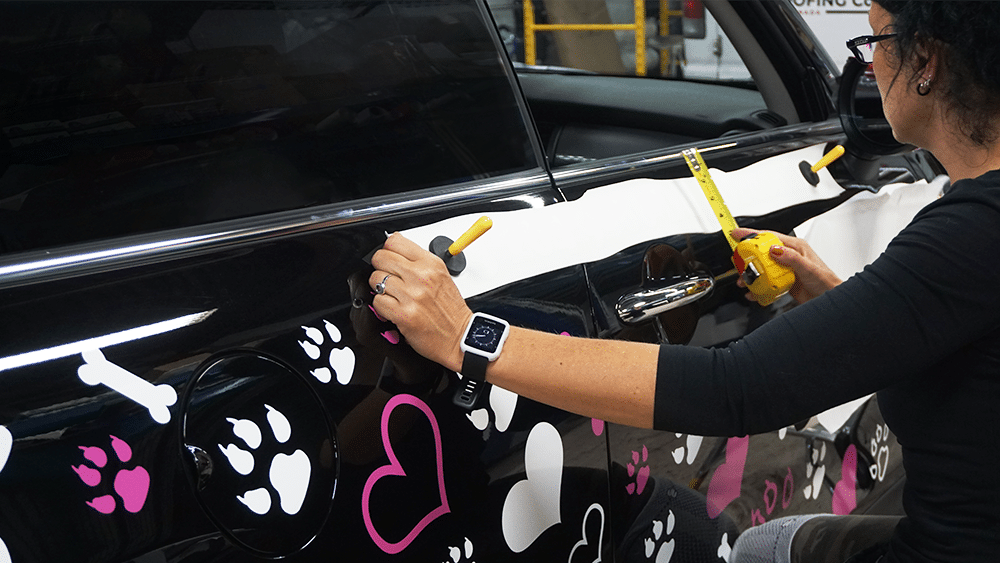
The decals are ready and now it’s time to decorate our branded vehicle.
The car is cleaned with an alcohol solution to get rid of any dust and grime that’ll affect the look of the vinyl.
Before the decals, the bigger pieces of wraps are placed.
The decals are placed on the car according to the mock-up made by our designers previously. This mock-up is the blueprint of the project.
Once our installer is satisfied with the placement of the decals, the layer protecting the adhesive is removed. To make sure the decals are securely in place, our installer goes over them with a sturdy card wrapped in a microfiber cloth.
Transfer tape is slowly removed to reveal the beautiful decorations on the freshly branded vehicle.
Finished car
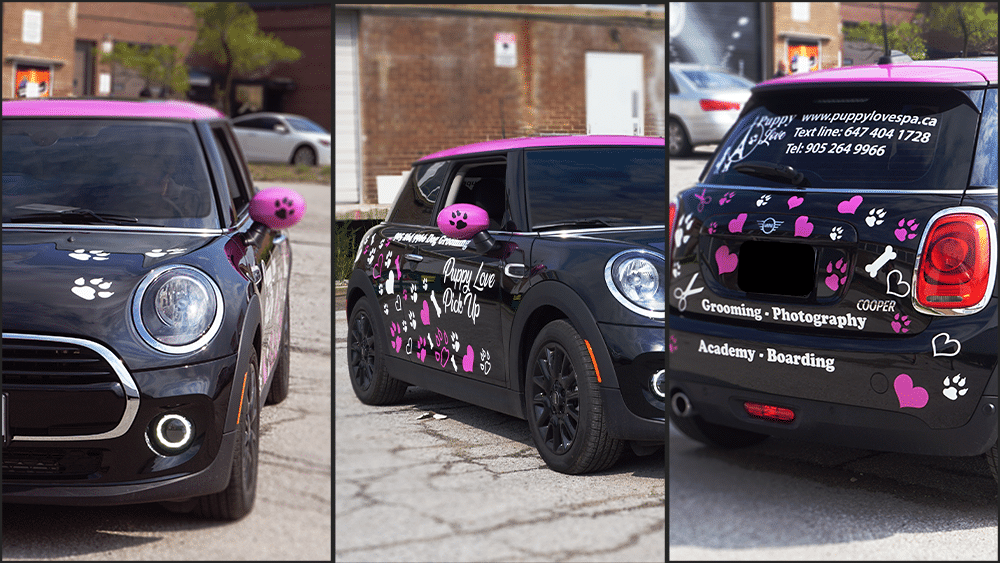
After all the pieces are installed, our installer cleans the car one last time and fixes any minor imperfections. Our client’s branded vehicle is ready to hit the road.
From a simple black Mini Cooper, this car was transformed into a colourful, happy representative of the brand.
Want to see all these steps in action? Check out our YouTube video to See this car transform into a branded vehicle.
Vinyl Wrap Toronto specializes in transforming your vehicles and making them one of a kind. You can check our vehicle portfolio. For any other branding needs, check out our Branding Centres portfolio.
To get your vehicle wrapped, feel free to reach out to us at (416) 288-8661 or visit our garage located at 24 Ronson Dr, Unit 1, Etobicoke, ON, M9W1B4.